Video Clips
Upload a long video (a webinar, a talk, a podcast recording) and AtSocials finds its best moments, crops them to vertical, follows the speaker's face, burns in captions and schedules the clips for you.
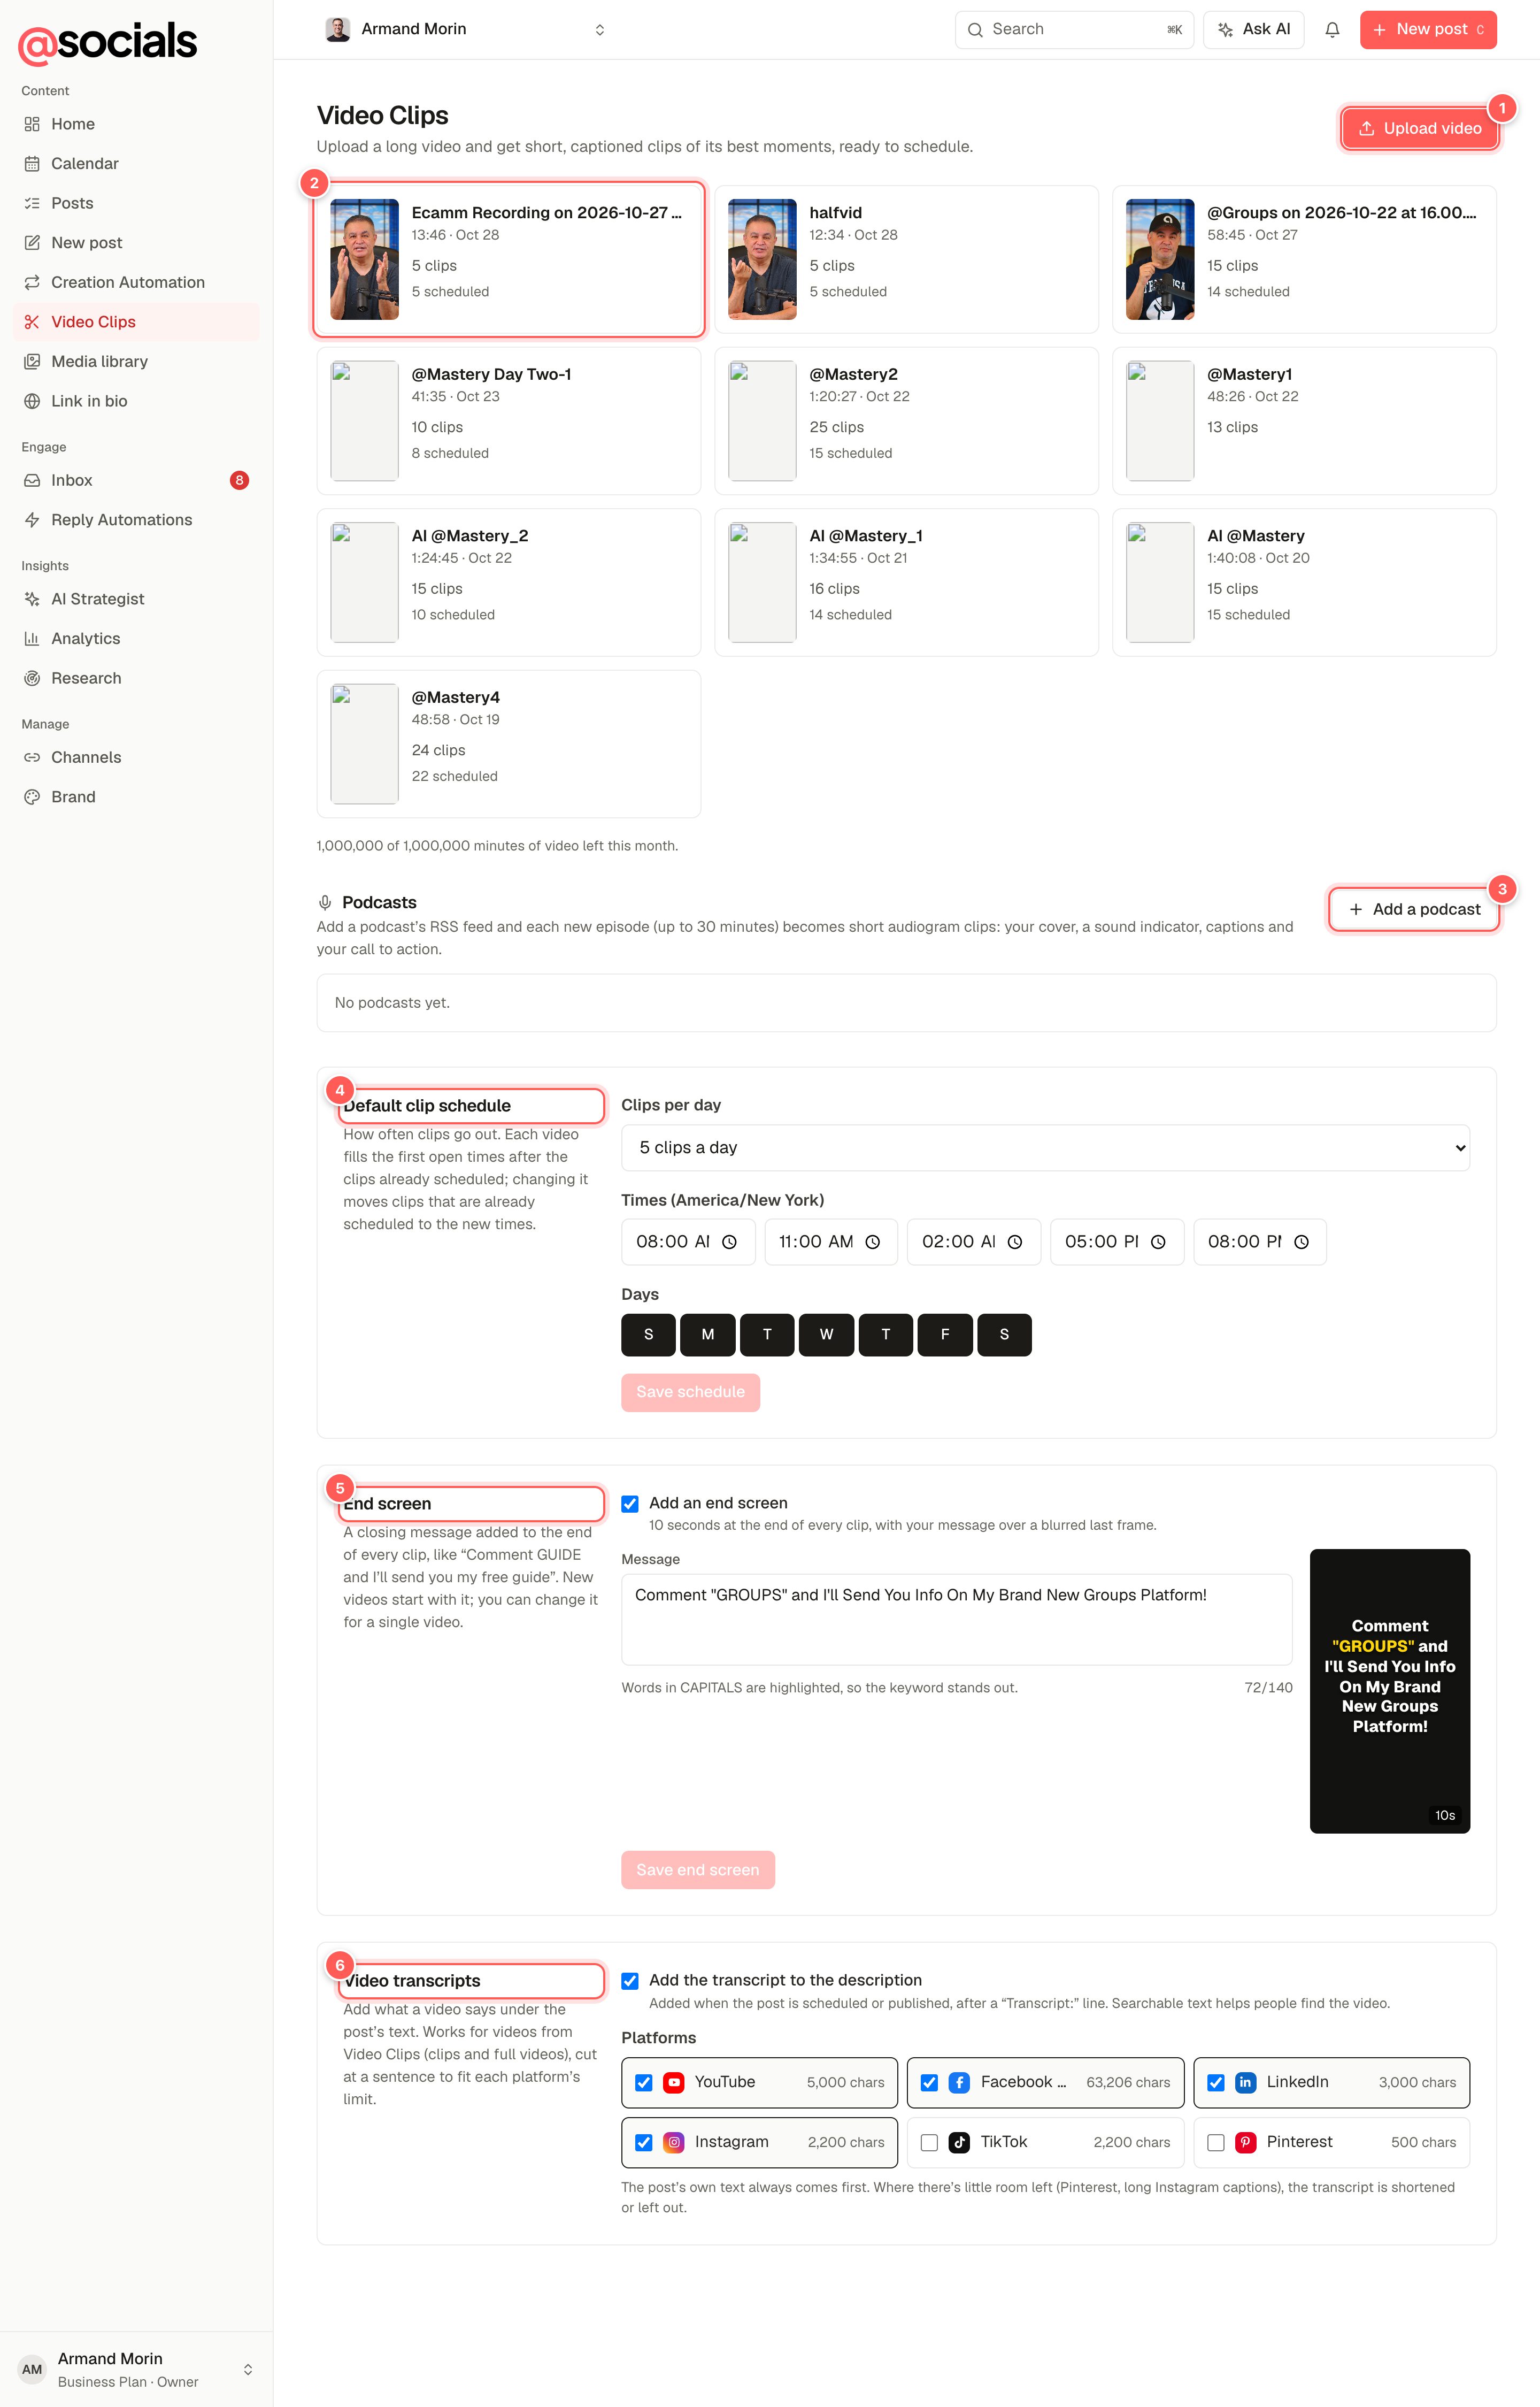
- Upload video starts a new video. See Make clips from a video.
- A video, with its length, upload date, how many clips it has and how many are scheduled. Click it to open its clips.
- Add a podcast turns podcast episodes into audiogram clips. See Podcasts.
- Default clip schedule: how many clips a day, the times and the days new videos start with.
- End screen: an optional 10-second closing card after every clip.
- Video transcripts: add each video's transcript to its description.
The minutes of video you have left this month are shown under the list.
Make clips from a video
- Click Upload video and choose the file.
- Give it a name, pick a clip length (15–30, 30–60 or 60–90 seconds) and check the end screen.
- Start. The video goes through Reading the video, Transcribing, Finding the best moments and Framing the speaker and adding captions.
Processing carries on even if you close the tab, and a spinner next to Video Clips in the sidebar shows it's still working. Clips are in English and come out vertical (9:16), ready for Reels, Shorts and TikTok.
Review and schedule clips
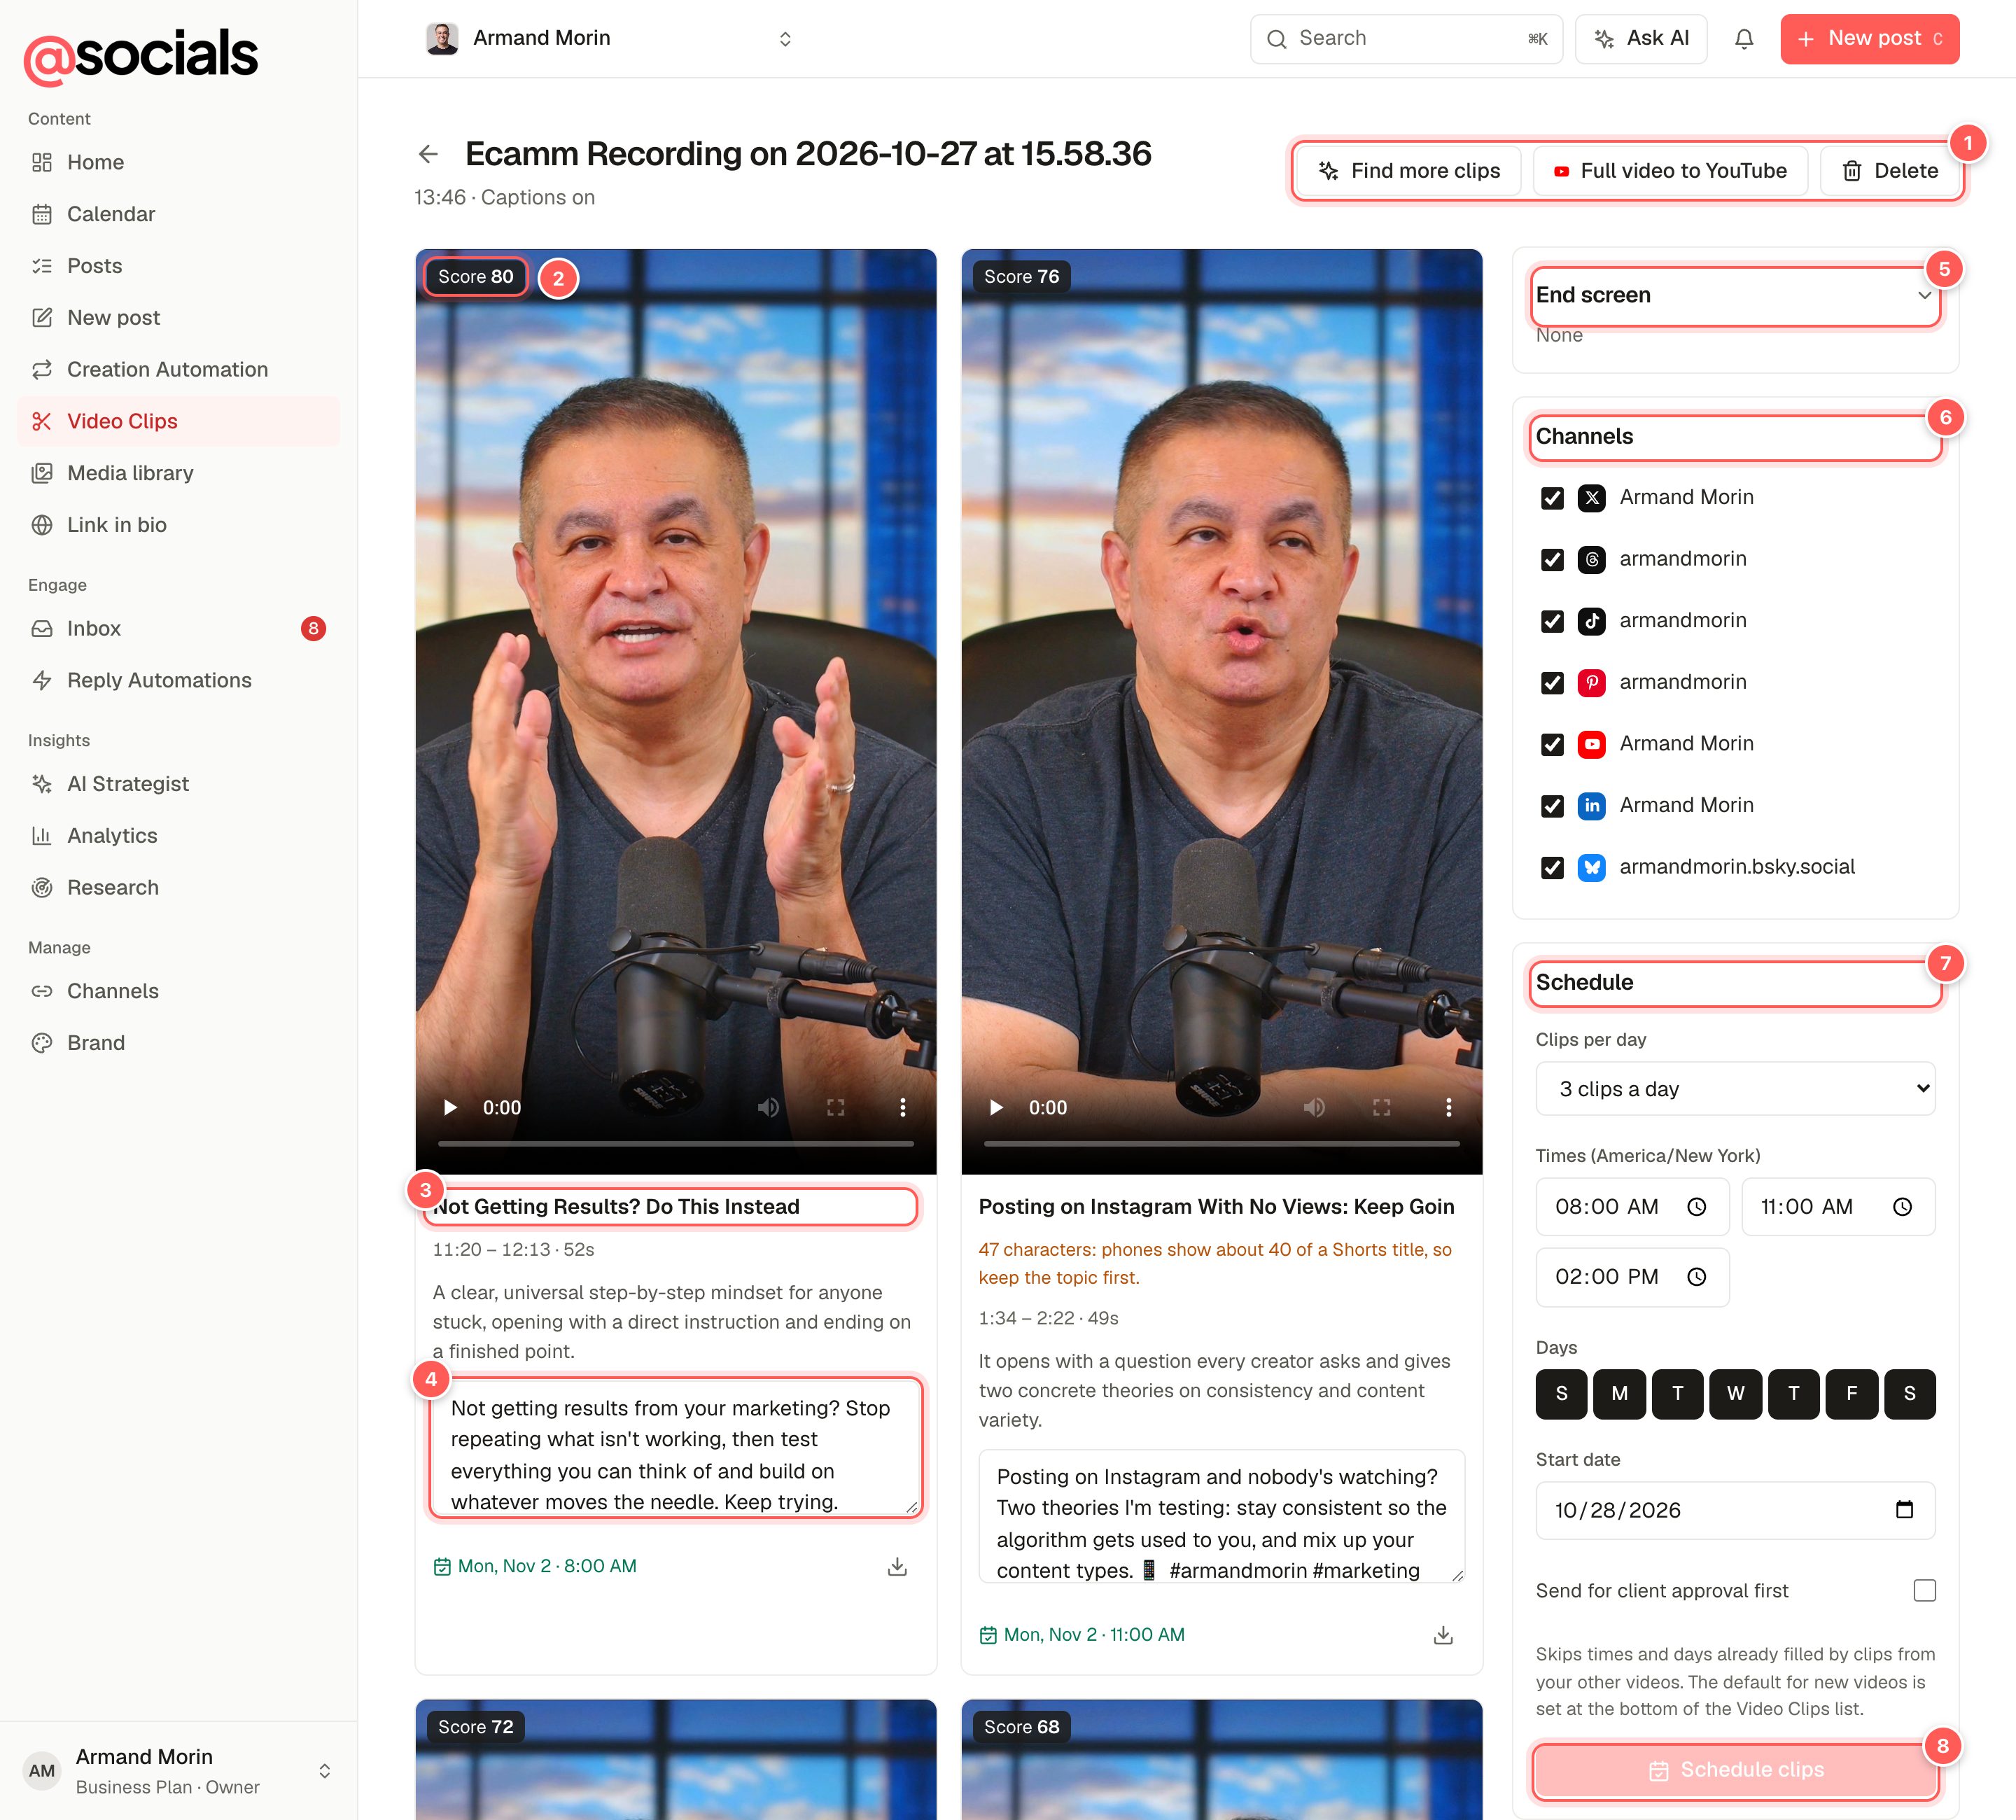
- Find more clips looks for more moments in the same video. Full video to YouTube prepares the whole video for YouTube (see below). Delete removes the video and its clips.
- Score. How strong the AI thinks the moment is, out of 100.
- Clip title. Also used as its YouTube Shorts title. Keep the topic in the first 40 characters; the app warns you when it's too long.
- Caption. The post caption for this clip. Edit it freely. The time range and a short summary of the moment are shown above it.
- End screen for this video. Changing it re-makes clips that aren't scheduled yet.
- Channels the clips go to.
- Schedule: clips per day, times, days and start date. Clips fill the first open times after the clips already scheduled, so a day never gets more than its share.
- Schedule clips creates the posts. Tick Send for client approval first above it if needed.
Each clip also has a download button and shows its scheduled date once it's booked. Scheduled clips appear in the Calendar like any other post, and their captions are added as subtitles where the network supports them.
Full video to YouTube
Want the whole recording on YouTube too? Full video to YouTube reads the transcript and writes a search phrase, three title options (each with the quote from the video that delivers on it), tags, a description and chapters that follow YouTube's rules. The composer then opens with the video, YouTube selected and everything filled in. It uses 1 AI caption.
End screen
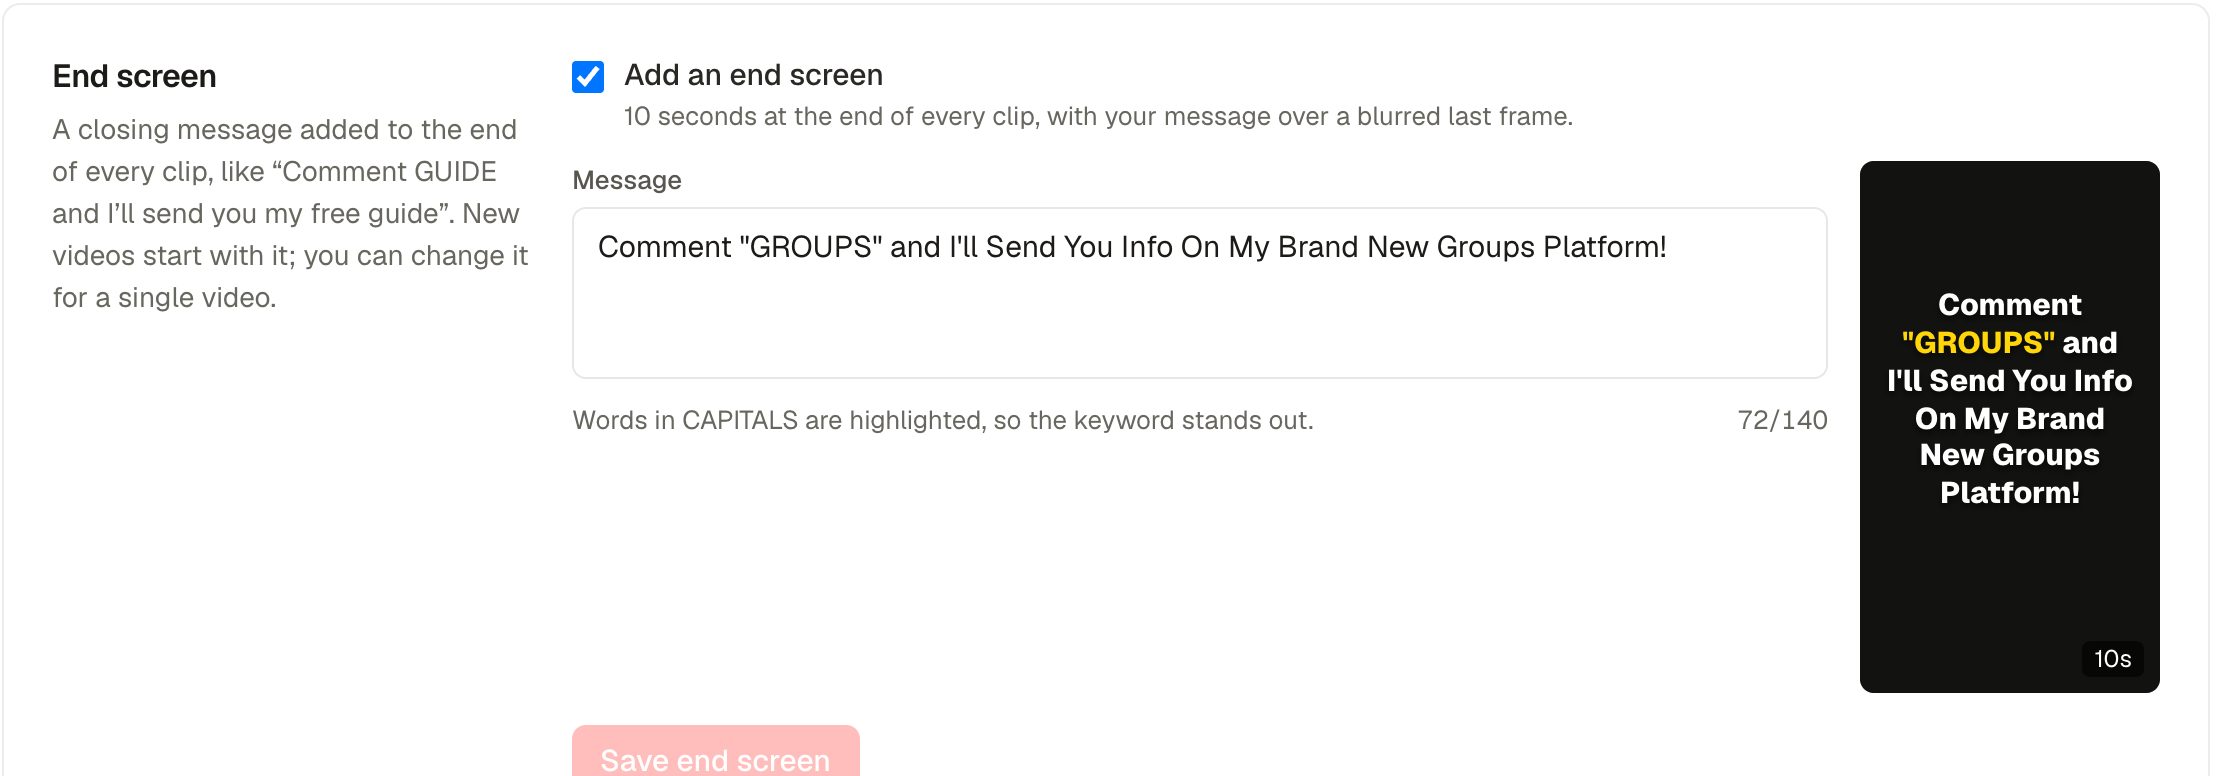
Write a short call to action, such as Comment "GUIDE" and I'll send you my free guide. Words in CAPITALS are highlighted, so a comment keyword stands out. Pair it with a Comment-to-DM automation to send the guide automatically. If a clip plus the end screen would be too long for Shorts, the end screen is shortened or left off.
Video transcripts in the description
Turn on Add the transcript to the description and pick the networks (YouTube, Facebook, LinkedIn, Instagram, TikTok, Pinterest). When a clip or full video is scheduled, the description gets your caption, then "Transcript:" and as many whole sentences as fit the network's limit. Searchable text helps people find the video. The same setting is on the Brand page.
Podcasts (audiograms)
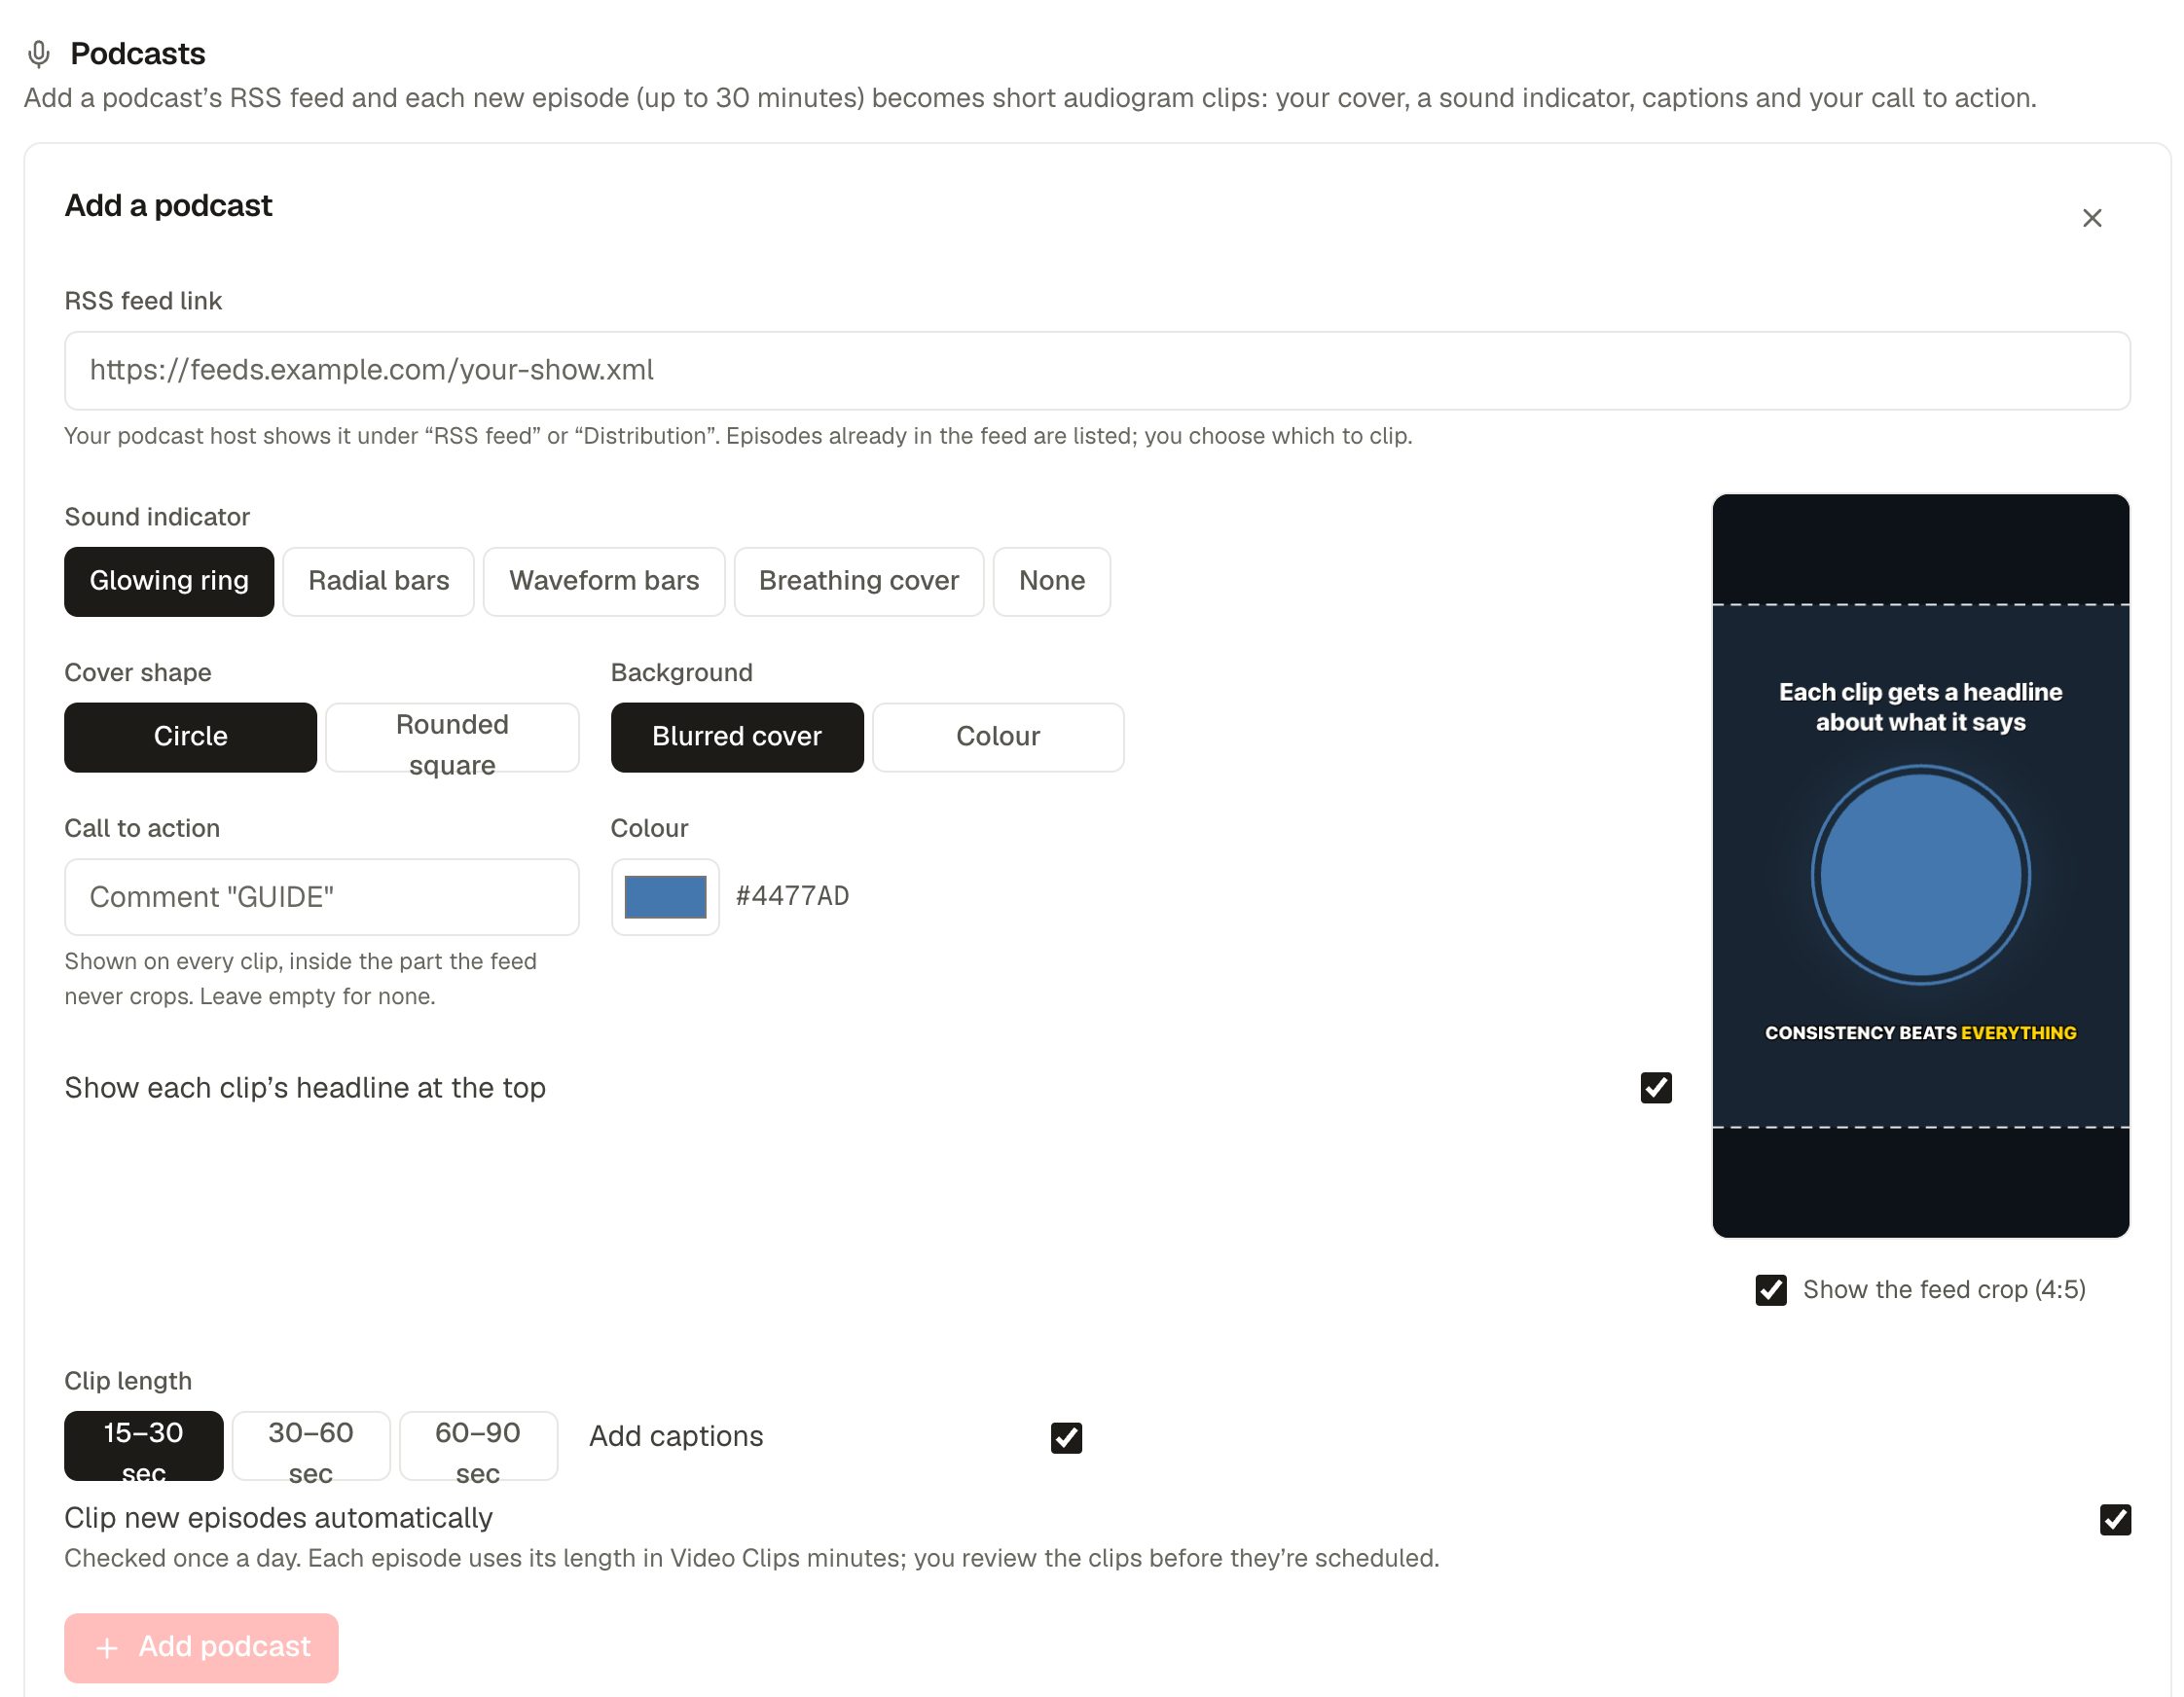
- Paste your podcast's RSS feed link (your podcast host shows it under "RSS feed" or "Distribution").
- Pick the look: a sound indicator (glowing ring, radial bars, waveform bars, breathing cover or none), the cover shape, a blurred-cover or colour background, a call to action and the colour. The preview updates as you go.
- Choose the clip length, whether to add captions and each clip's headline, and whether to clip new episodes automatically (checked once a day).
- Click Add podcast. Episodes are listed; click Make clips on any episode up to 30 minutes long.
Everything is laid out to stay inside Instagram's 4:5 feed crop and clear of the apps' buttons. You're notified when an episode's clips are ready.